

Availability
Tyk AI Studio’s Tool System allows Large Language Models (LLMs) to interact with external APIs and services, dramatically extending their capabilities beyond simple text generation. This enables LLMs to perform actions, retrieve real-time data, and integrate with other systems.
To manage Tools, go to Context management > Tools in the AI Studio admin UI sidebar.
Purpose
Tools bridge the gap between conversational AI and external functionalities. By defining tools, you allow LLMs interacting via the Chat Interface or API to:- Access real-time information (e.g., weather, stock prices, database records).
- Interact with other software (e.g., search JIRA tickets, update CRM records, trigger webhooks).
- Perform complex calculations or data manipulations using specialized services.
Core Concepts
- Tool Definition: A Tool in Tyk AI Studio is essentially a wrapper around an external API. Its structure and available operations are defined using an OpenAPI Specification (OAS) (v3.x, JSON or YAML).
-
Allowed Operations: From the provided OAS, administrators select the specific
operationIdsthat the LLM is permitted to invoke. This provides granular control over which parts of an API are exposed. - Authentication: Tools often require authentication to access the target API. Tyk AI Studio handles this securely by integrating with Secrets Management. You configure the authentication method (e.g., Bearer Token, Basic Auth) defined in the OAS. Reference a stored Secret that contains the actual credentials.
- Privacy Levels: Each Tool is assigned a privacy level. This level is compared against the privacy level of the LLM Configuration being used. A Tool can only be used if its privacy level is less than or equal to the LLM’s level. This prevents sensitive tools from use with less secure or external LLMs. Privacy levels define how data is protected by controlling LLM access based on its sensitivity. See Privacy Levels for the full score mapping and how the comparison works.
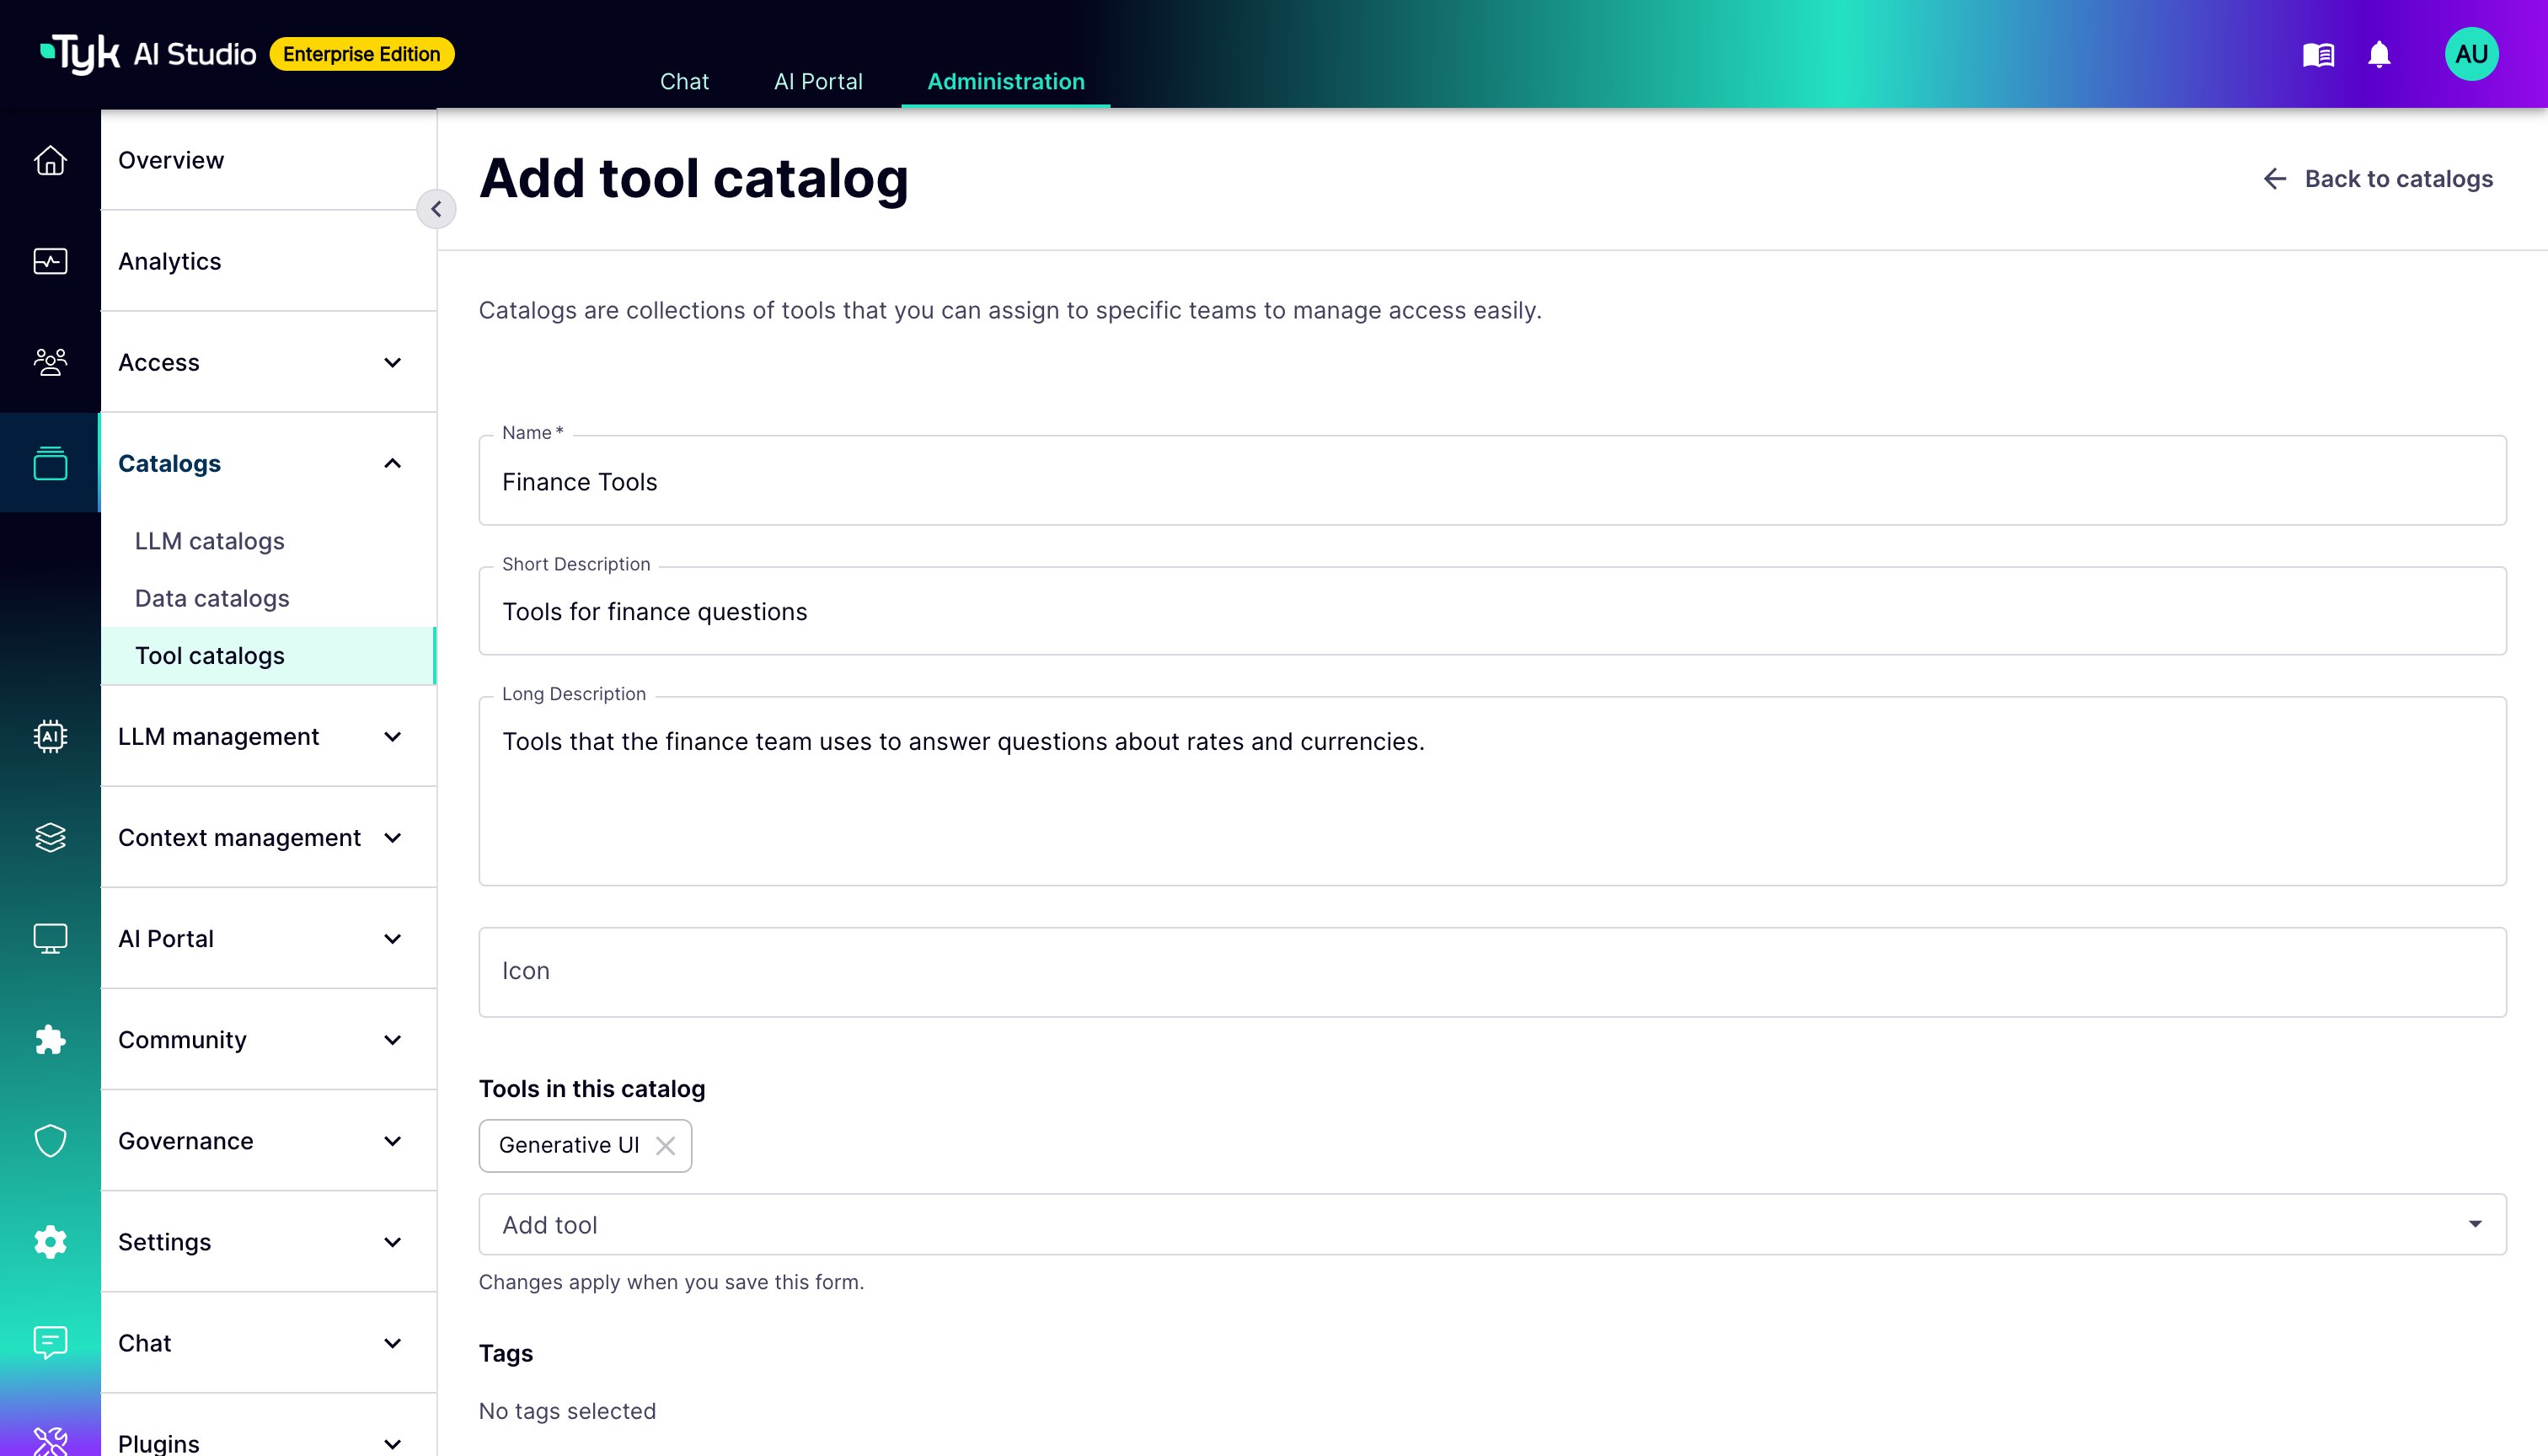
- Tool Catalogues: Tools are grouped into logical collections called Catalogues. This simplifies management and access control.
- Filters: Optional Filters can check and change the arguments sent to the tool and the responses from it. For example, they can remove sensitive data. Refer to Tool Filters.
- Documentation: Administrators can provide additional natural language documentation or instructions for the LLM. This guides the LLM on how and when to use the tool effectively.
- Dependencies: Tools can declare dependencies on other tools, although the exact usage pattern may vary.
Availability
Tools are available on both AI Studio (embedded gateway) and Edge Gateway (edge gateways). Tool configurations, OpenAPI specs, auth credentials, and app access associations are synced to edge gateways via the hub-spoke configuration system. Tools support namespace filtering for enterprise multi-tenant deployments.Access Methods
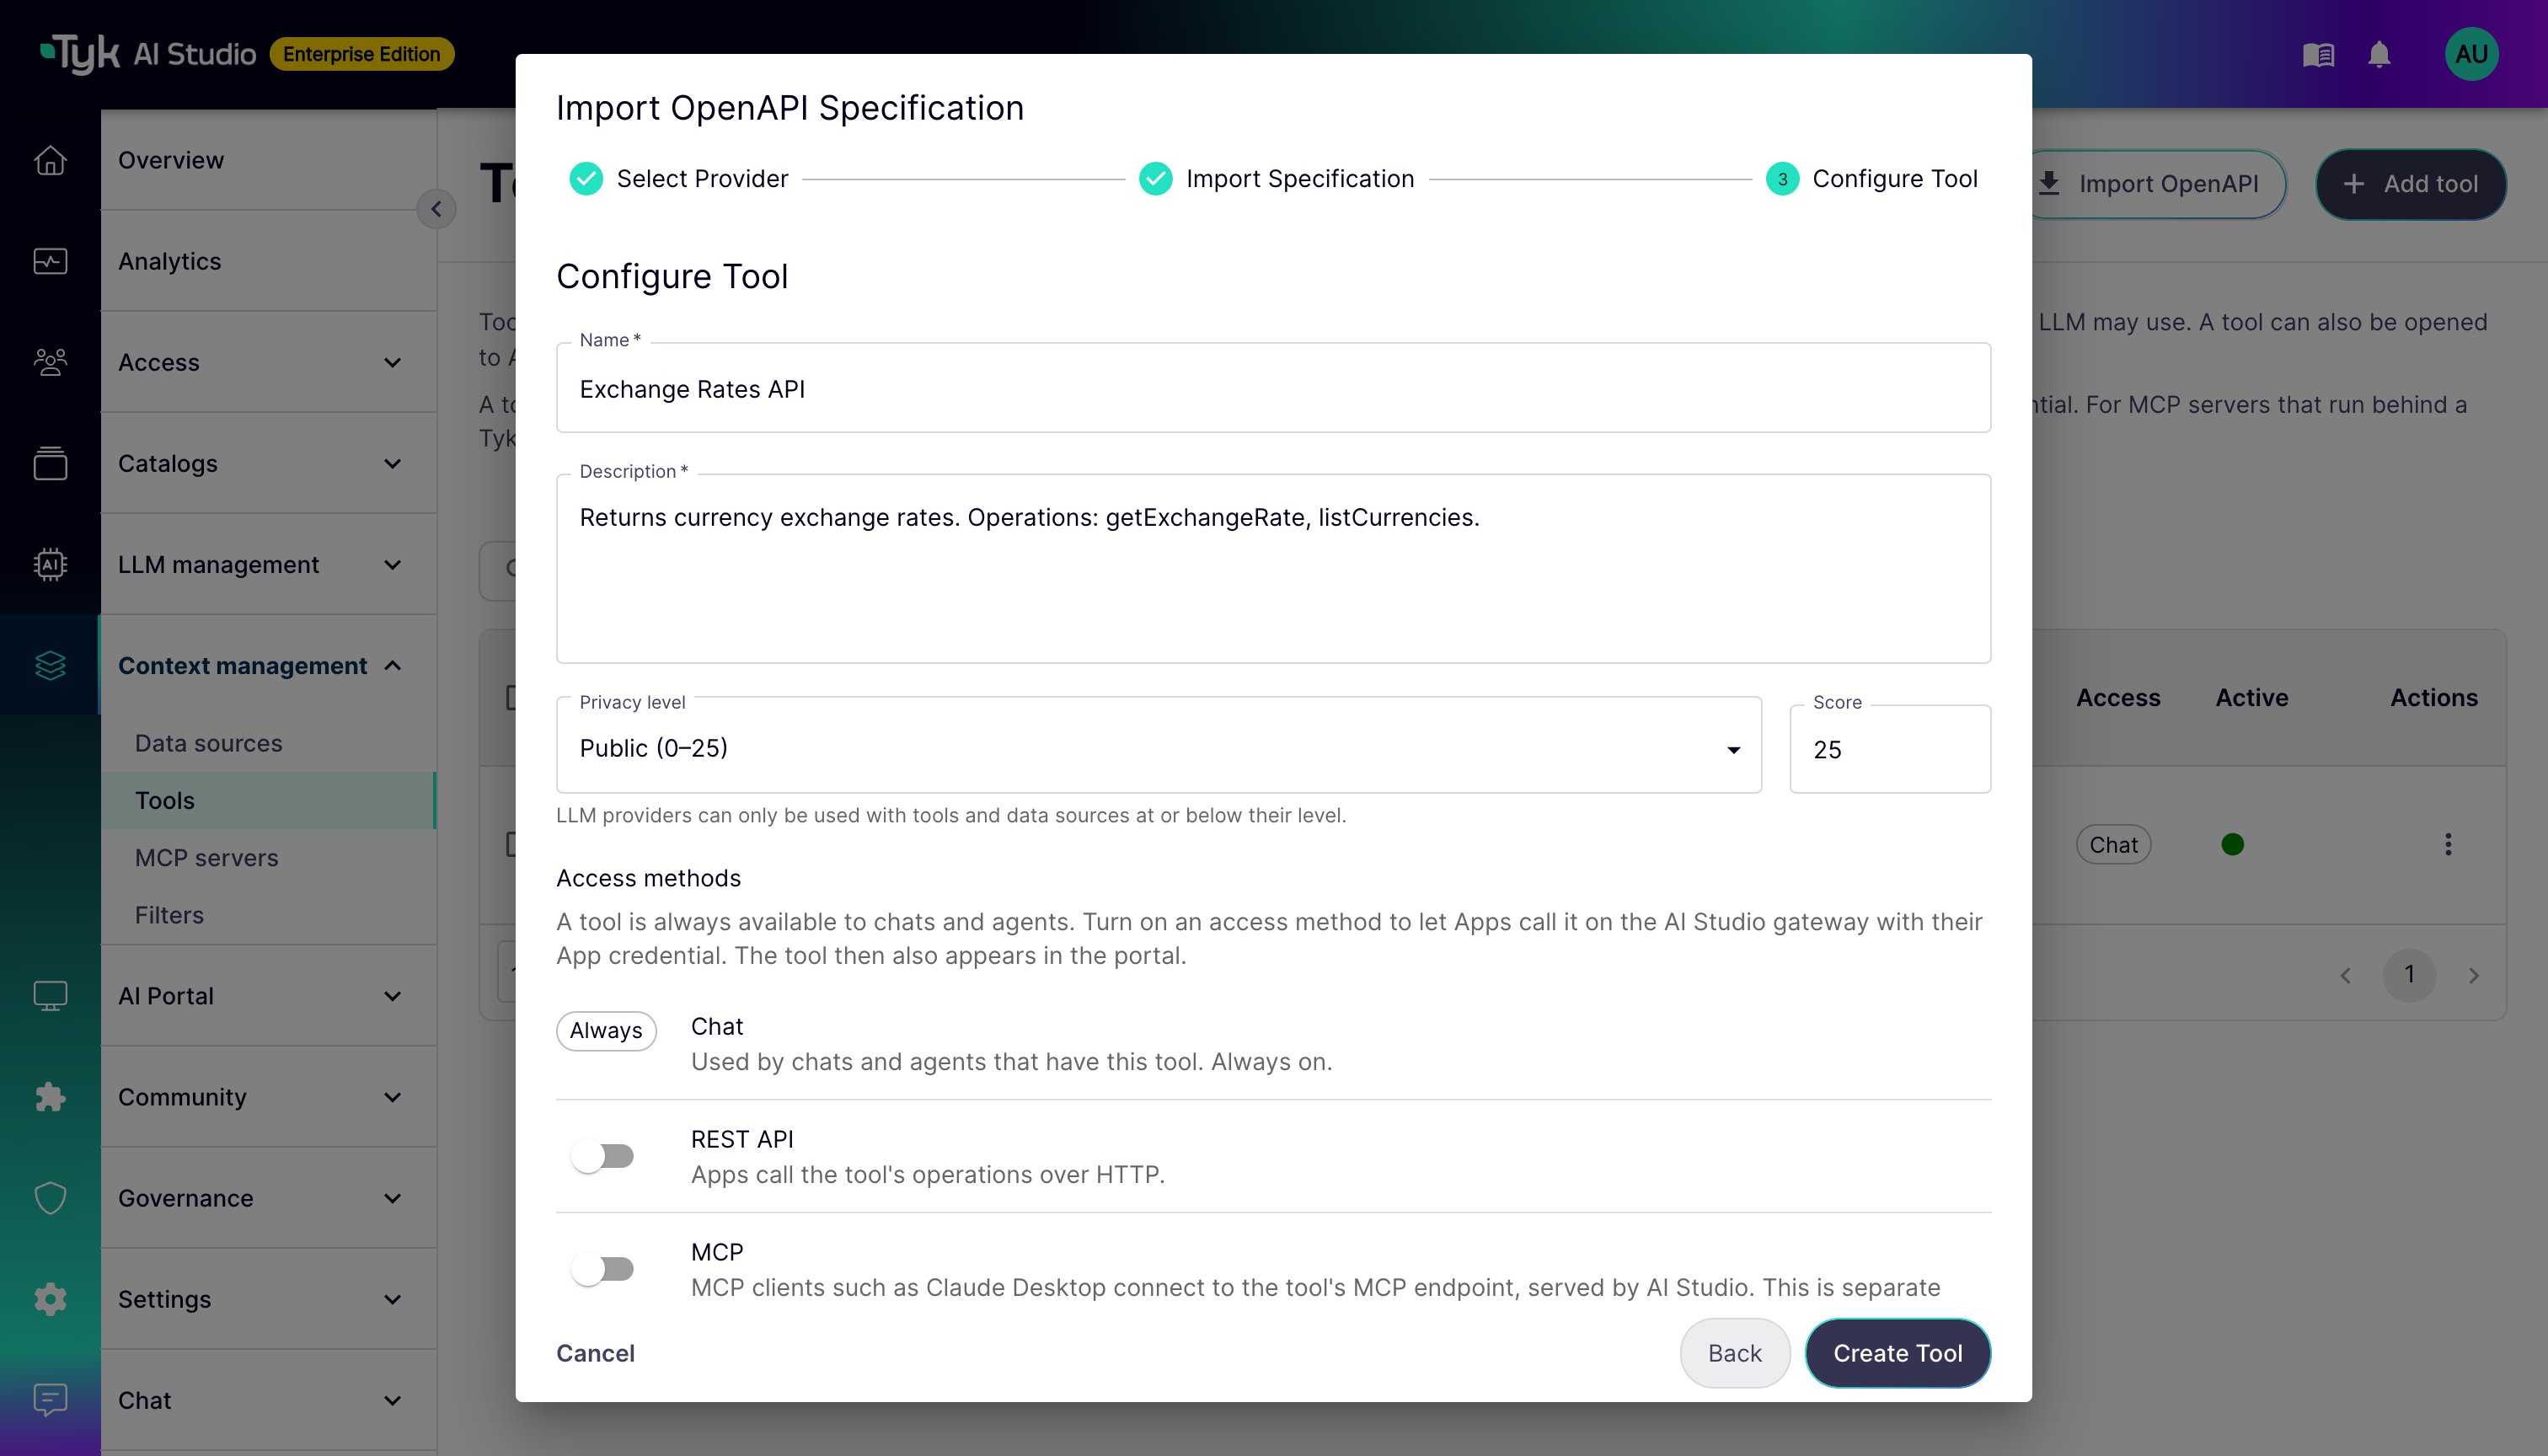
A tool is a chat capability first. You can also make it available to Apps on the gateway. Each way to do this is an access method, and an administrator turns each method on for each tool:
The switches are in the Access methods section of the tool form and of the last step of the import wizard. The section also shows the gateway URL of each method that is on. The Tools list shows the methods in its Access column. Tools that existed before v2.2.0 keep both methods on.
A tool with both methods off is chat only:
- It is available in the chat tool picker.
- It is not visible in the AI Portal. It is not in Browse, on an asset or documentation page, or in the App builder.
- You cannot add it to an App. If you turn off both methods on a tool that Apps already use, the Apps keep the tool. The gateway refuses their calls with
403, and the App page tells the owner why.
- The calling App must have the tool. This check applies to every authentication method, including OAuth tokens on the MCP endpoint.
- Callers can use only the operations that are selected on the tool. A REST call with an
operation_idthat is not selected returns403. A REST call without anoperation_idreturns400. - The tool’s filters run on the arguments and on the response.
403.
Tools and MCP Servers
In the Enterprise Edition, the admin UI also has an MCP servers section (Context management > MCP servers). A tool and an MCP server are different, although you can reach a tool over MCP:
Use a tool when chats and agents in AI Studio must use the API. Also use a tool when AI Studio filters must apply to it. Use an MCP server when your Tyk Gateway must serve and govern the MCP traffic. The AI Portal shows which component serves each endpoint. The App page gives developers one MCP client configuration that includes both.
For MCP servers, refer to Tyk Dashboard MCP Integration.
Authentication Plugins
From v2.2.1, a tool can have an ordered list of authentication plugins. You set the list in the Authentication plugins section of the tool detail page, or withGET and PUT /api/v1/tools/{id}/auth-plugins. When the list is not empty, only these plugins authenticate calls to the tool on Edge Gateways, on REST and on every MCP transport. The Edge Gateways then refuse App keys for the tool. The embedded gateway in AI Studio does not run authentication plugins. For more information, refer to Edge Gateway Plugins.
How it Works
When a user interacts with an LLM via the Chat Interface:- The LLM receives the user prompt and the definitions of available tools (based on team permissions and Chat Experience configuration).
- The LLM determines whether it needs one or more tools to answer the prompt. If so, it generates a request to invoke the specific tool operation(s) with the required parameters.
- Tyk AI Studio intercepts this request.
- It validates the request, checks permissions, and retrieves necessary secrets for authentication.
- Tyk AI Studio applies any configured request Filters.
- It calls the external API defined by the Tool.
- It receives the response from the external API.
- Tyk AI Studio applies any configured response Filters.
- It sends the tool’s response back to the LLM.
- The LLM uses the tool’s response to formulate its final answer to the user.
Creating & Managing Tools (Admin)
Administrators define and manage Tools via the UI or API:- Define Tool: Provide a name, description, and privacy level. In Tool type, keep REST API (OpenAPI) for a tool that calls an HTTP API. Client (human-in-the-loop) tools run in the chat interface. Refer to Chat Interface.
- Upload OpenAPI Spec: Provide the OAS document (JSON/YAML).
-
Select Operations: Choose the specific
operationIdsthe LLM can use. - Configure Authentication: Select the OAS security scheme and link to a stored Secret for credentials.
- Add Documentation: Provide natural language instructions for the LLM.
- Assign Filters (Optional): Add request/response filters.
-
Choose Access Methods (Optional): Turn on REST API or MCP if Apps must reach the tool on the gateway. A new tool is chat only. Refer to Access Methods.
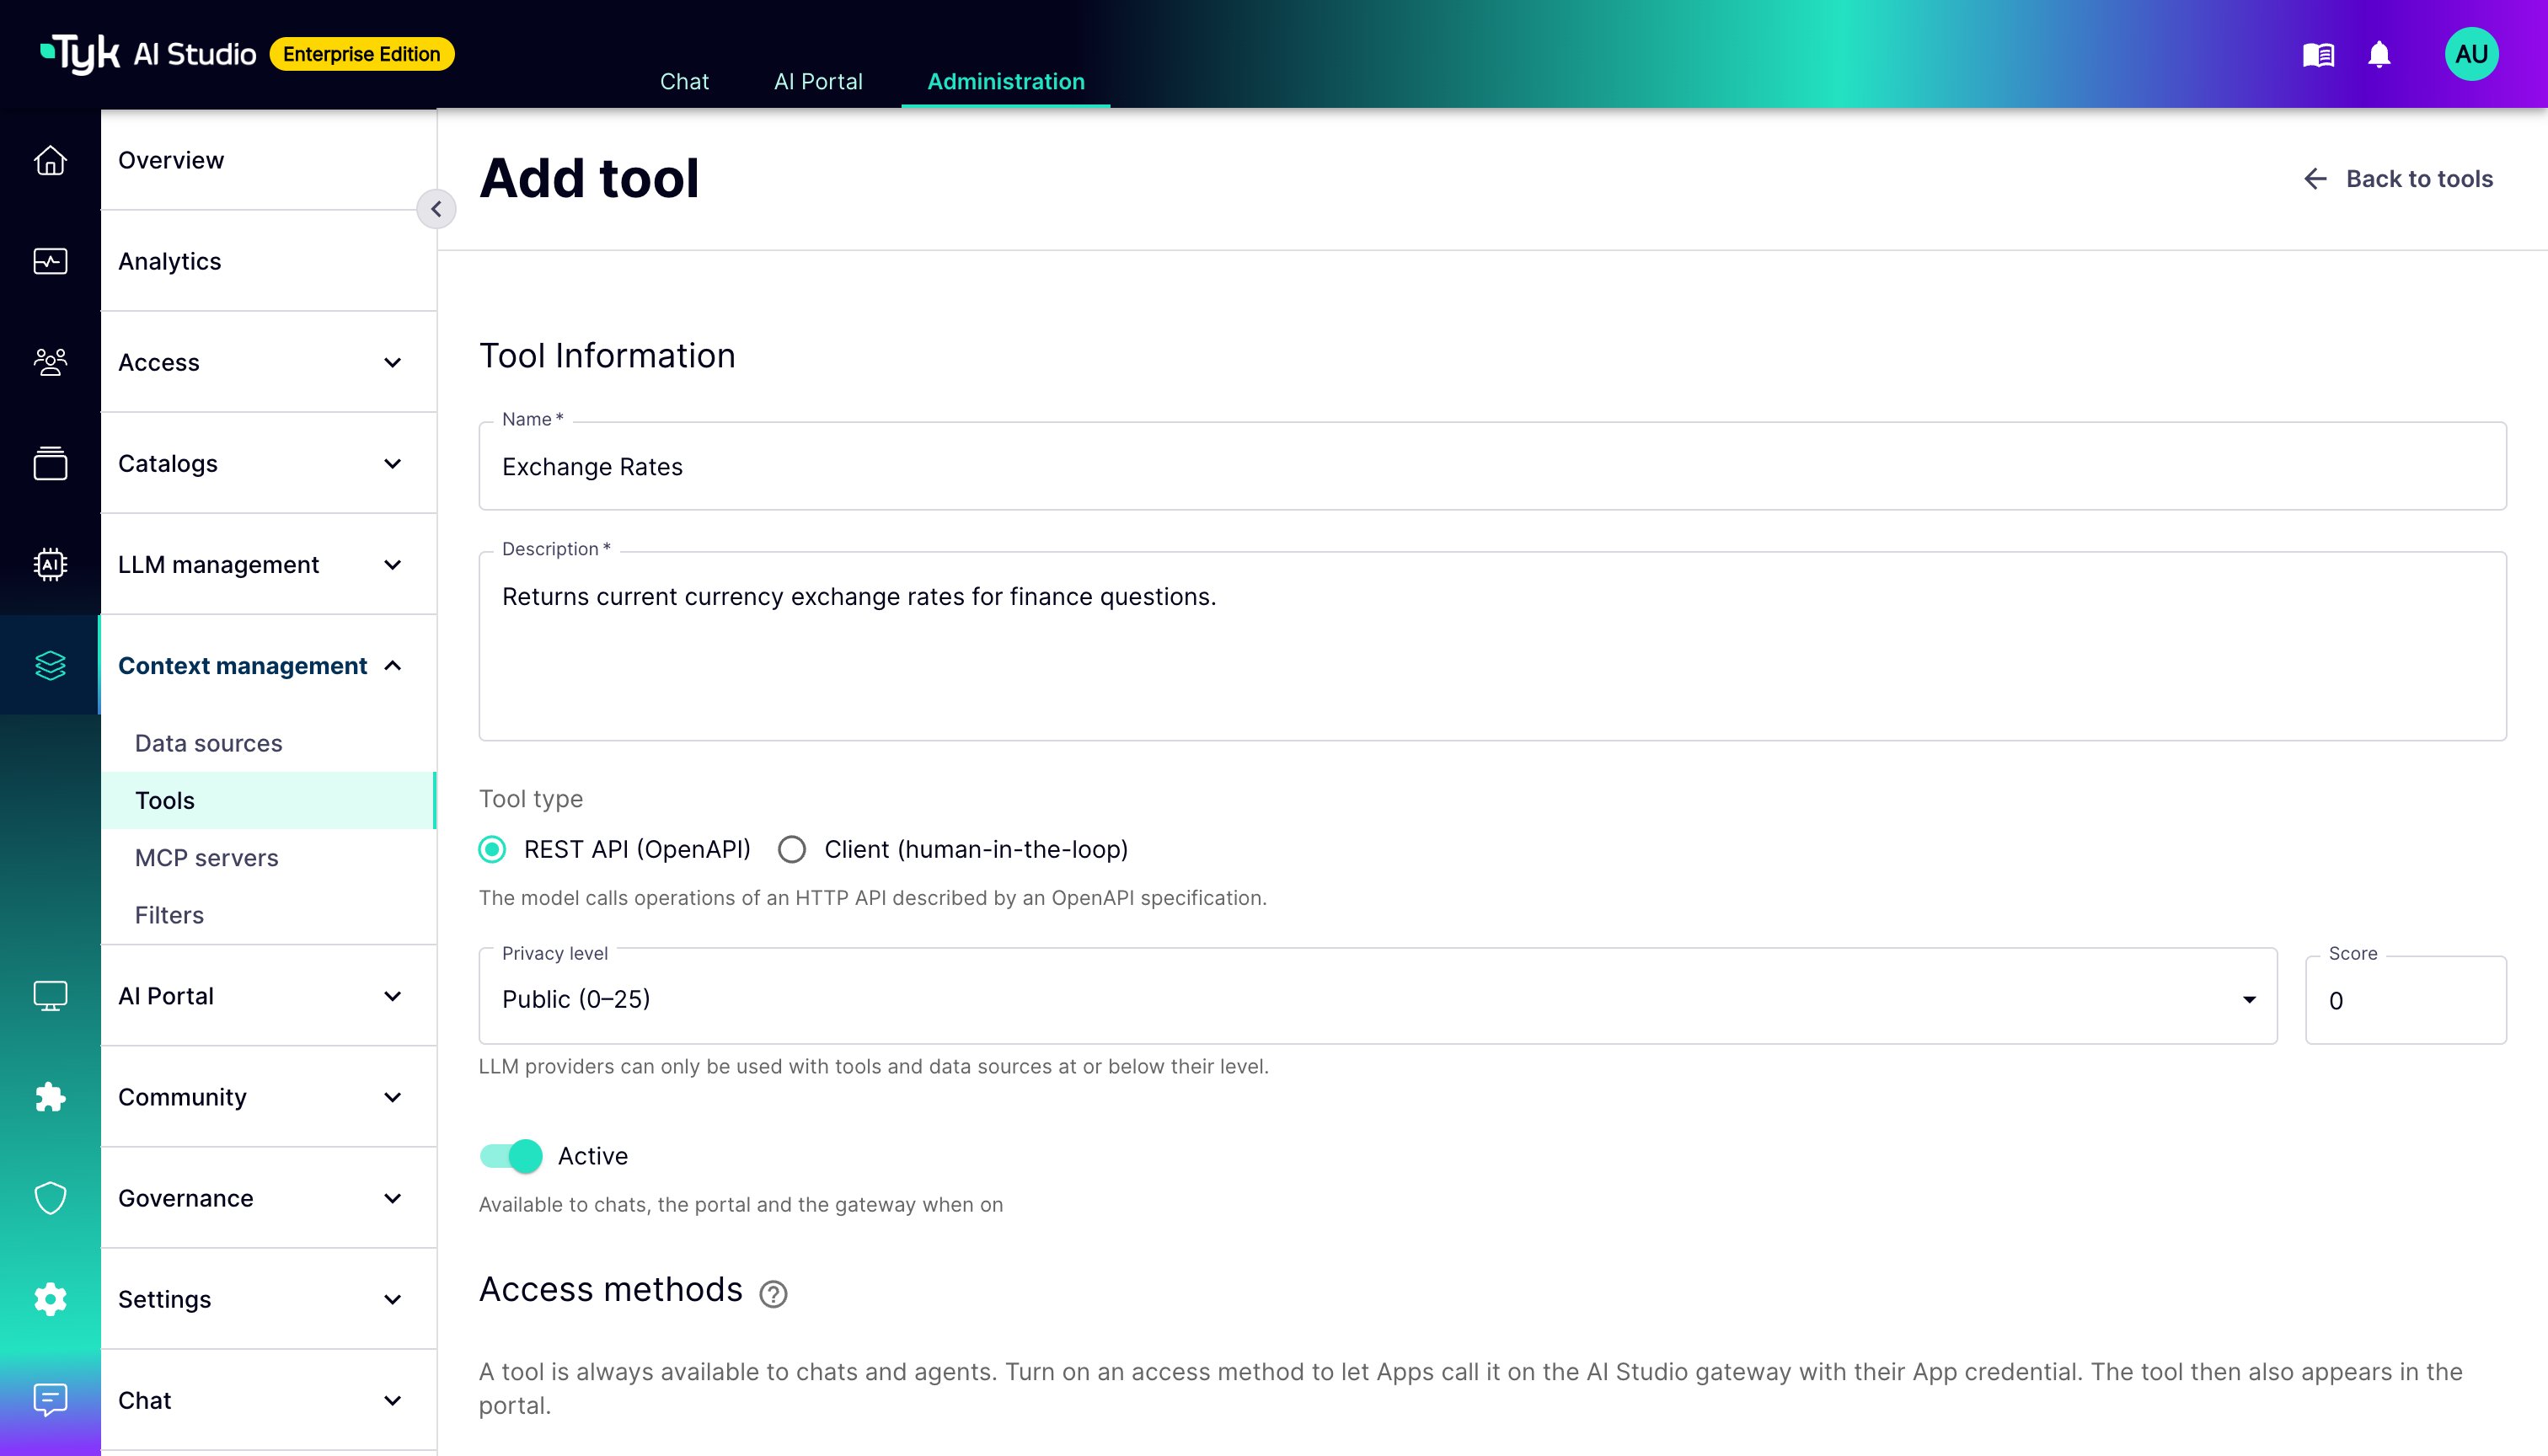
rest_access_enabled and mcp_access_enabled attributes of a tool. If you do not send them in a create request, the tool is chat only. If you do not send them in an update request, they keep their current values. Tool responses also contain slug, app_grantable, rest_endpoint_url, and mcp_endpoint_url.
When an App is created, AI Studio checks the privacy level of each tool against the LLMs of the App. A tool with a higher privacy level than the LLMs is refused, and the error names the tool and the LLM.
Importing Tools from a Tyk Dashboard (Admin)
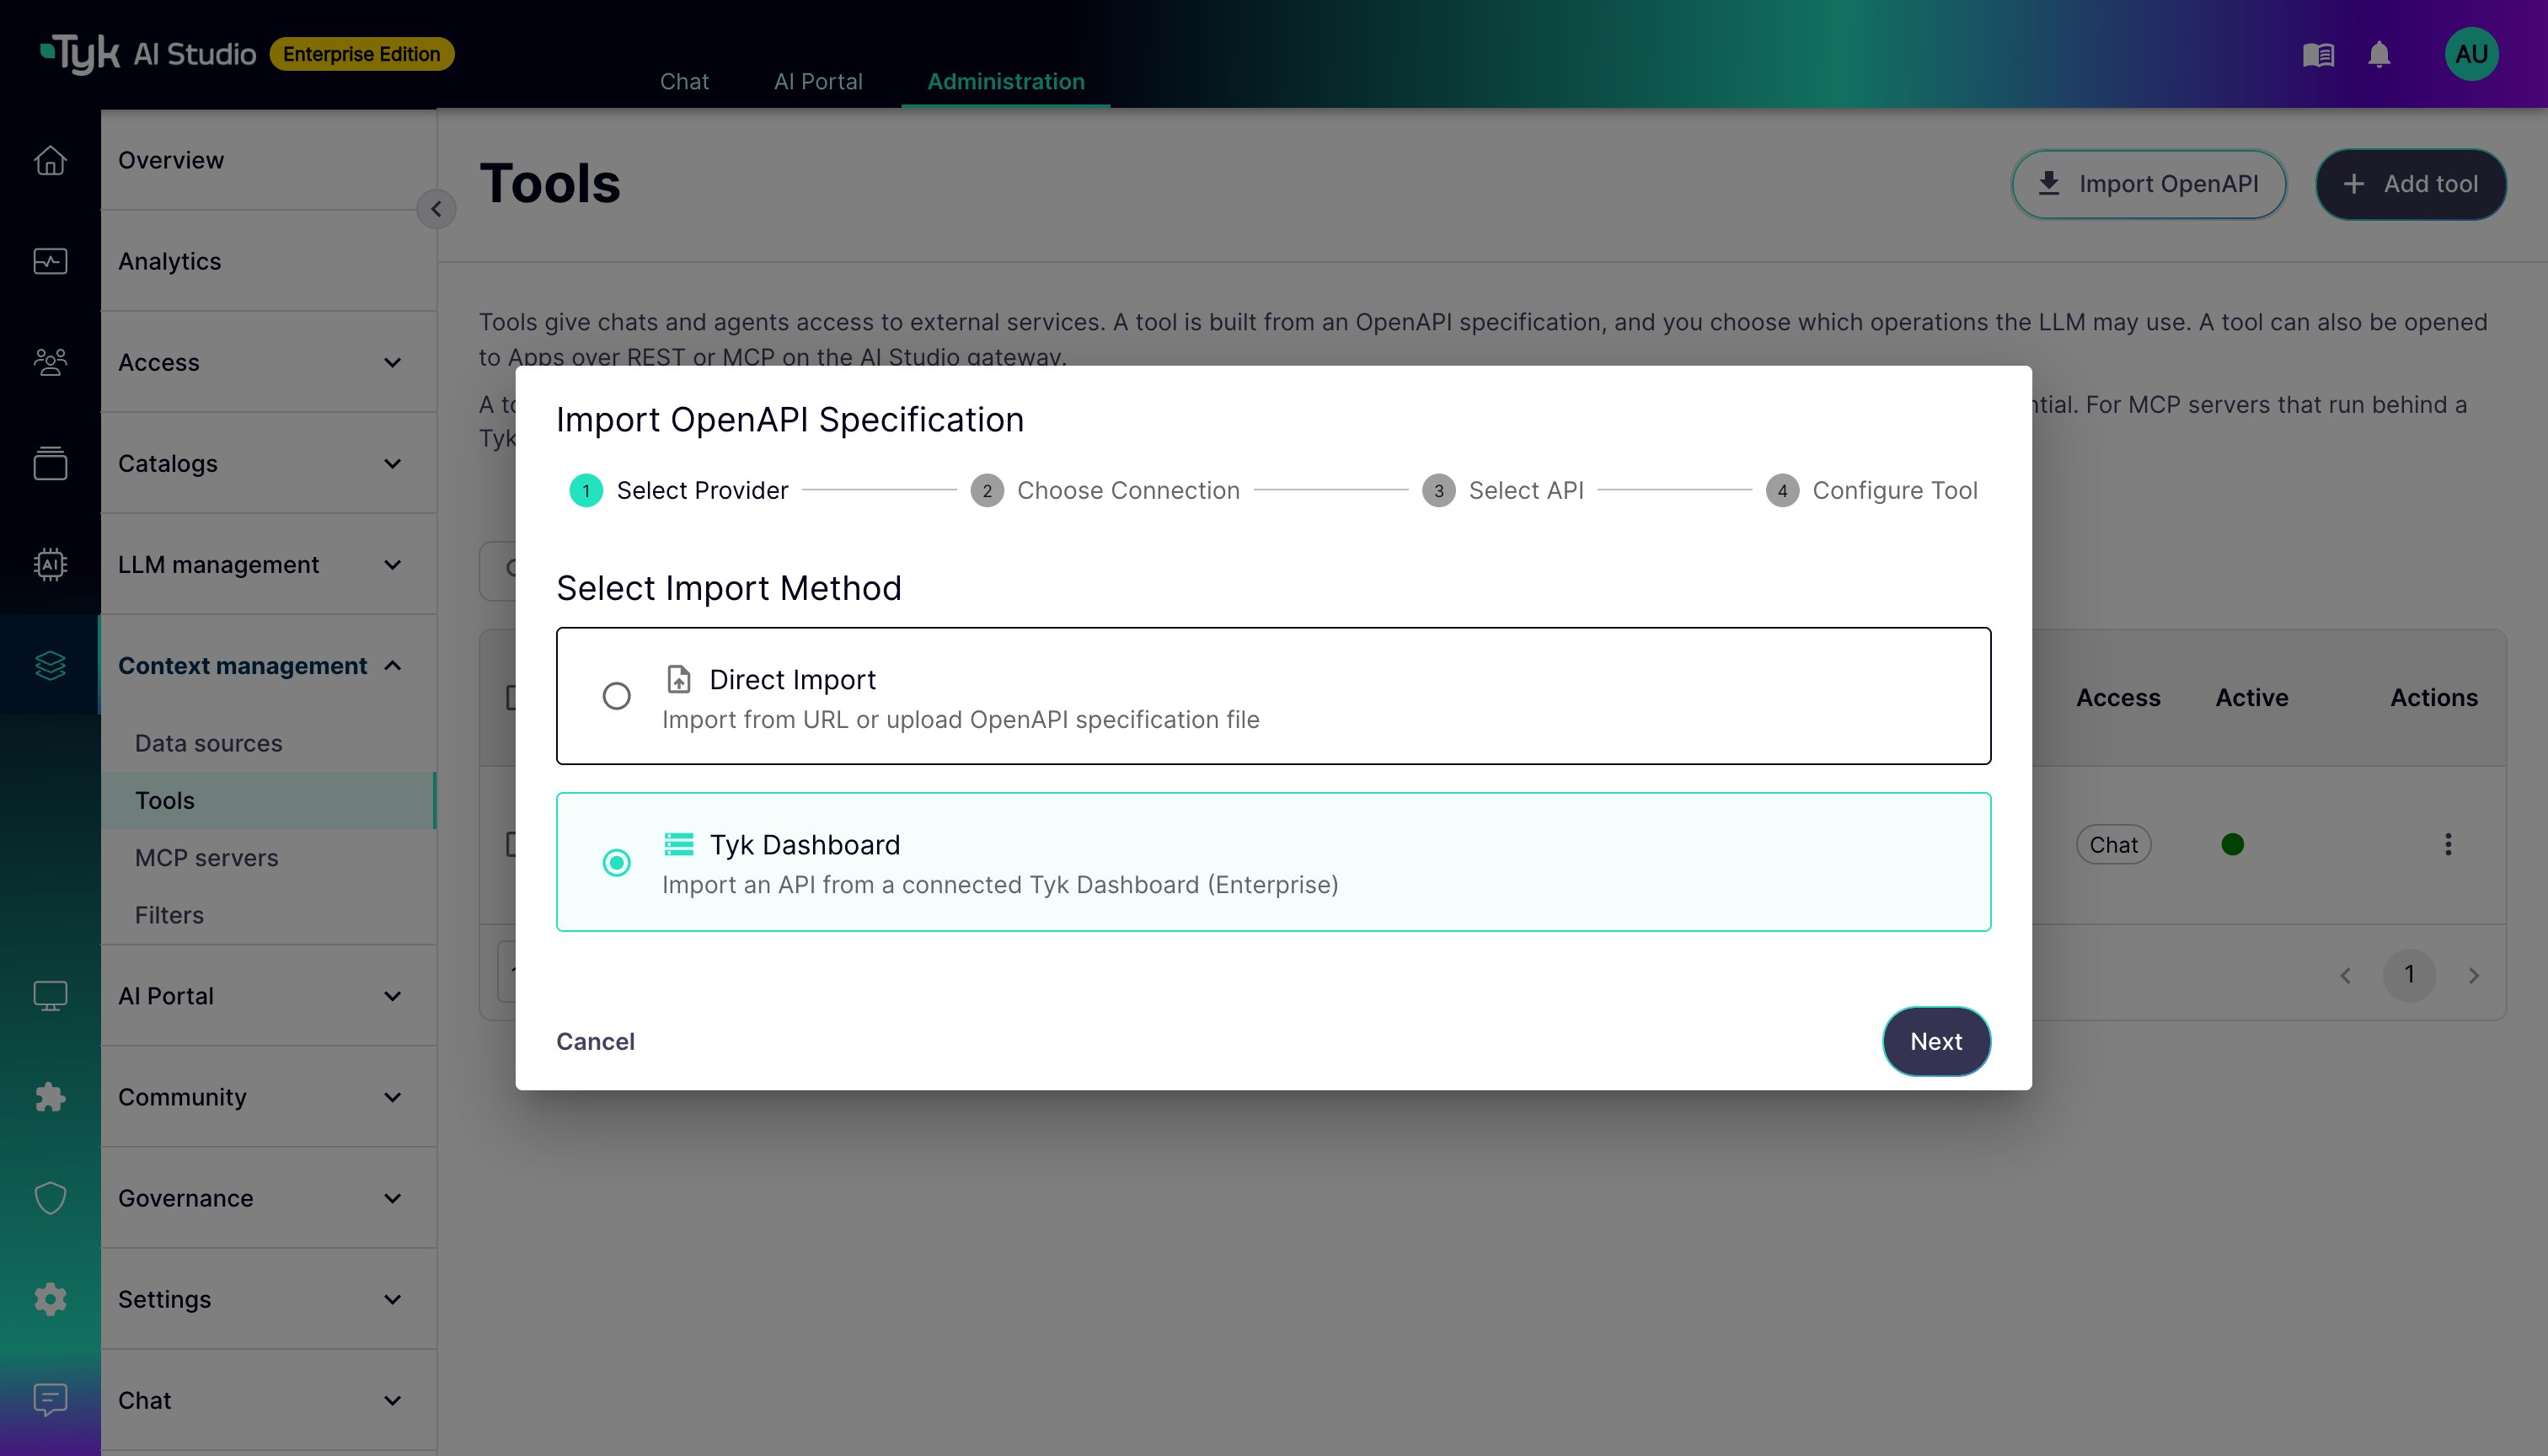
The Import OpenAPI wizard on the Tools page creates a tool from an OpenAPI specification. It has two import methods:- Direct Import: Imports a specification from a URL, an uploaded file, or pasted text. This method is available in all editions.
- Tyk Dashboard (Enterprise Edition): Imports an API from a Tyk Dashboard, through a saved Tyk connection.
Start the Wizard
- Go to Context management > Tools.
- Click Import OpenAPI.
- Select Tyk Dashboard.
- Click Next.
Choose a Connection
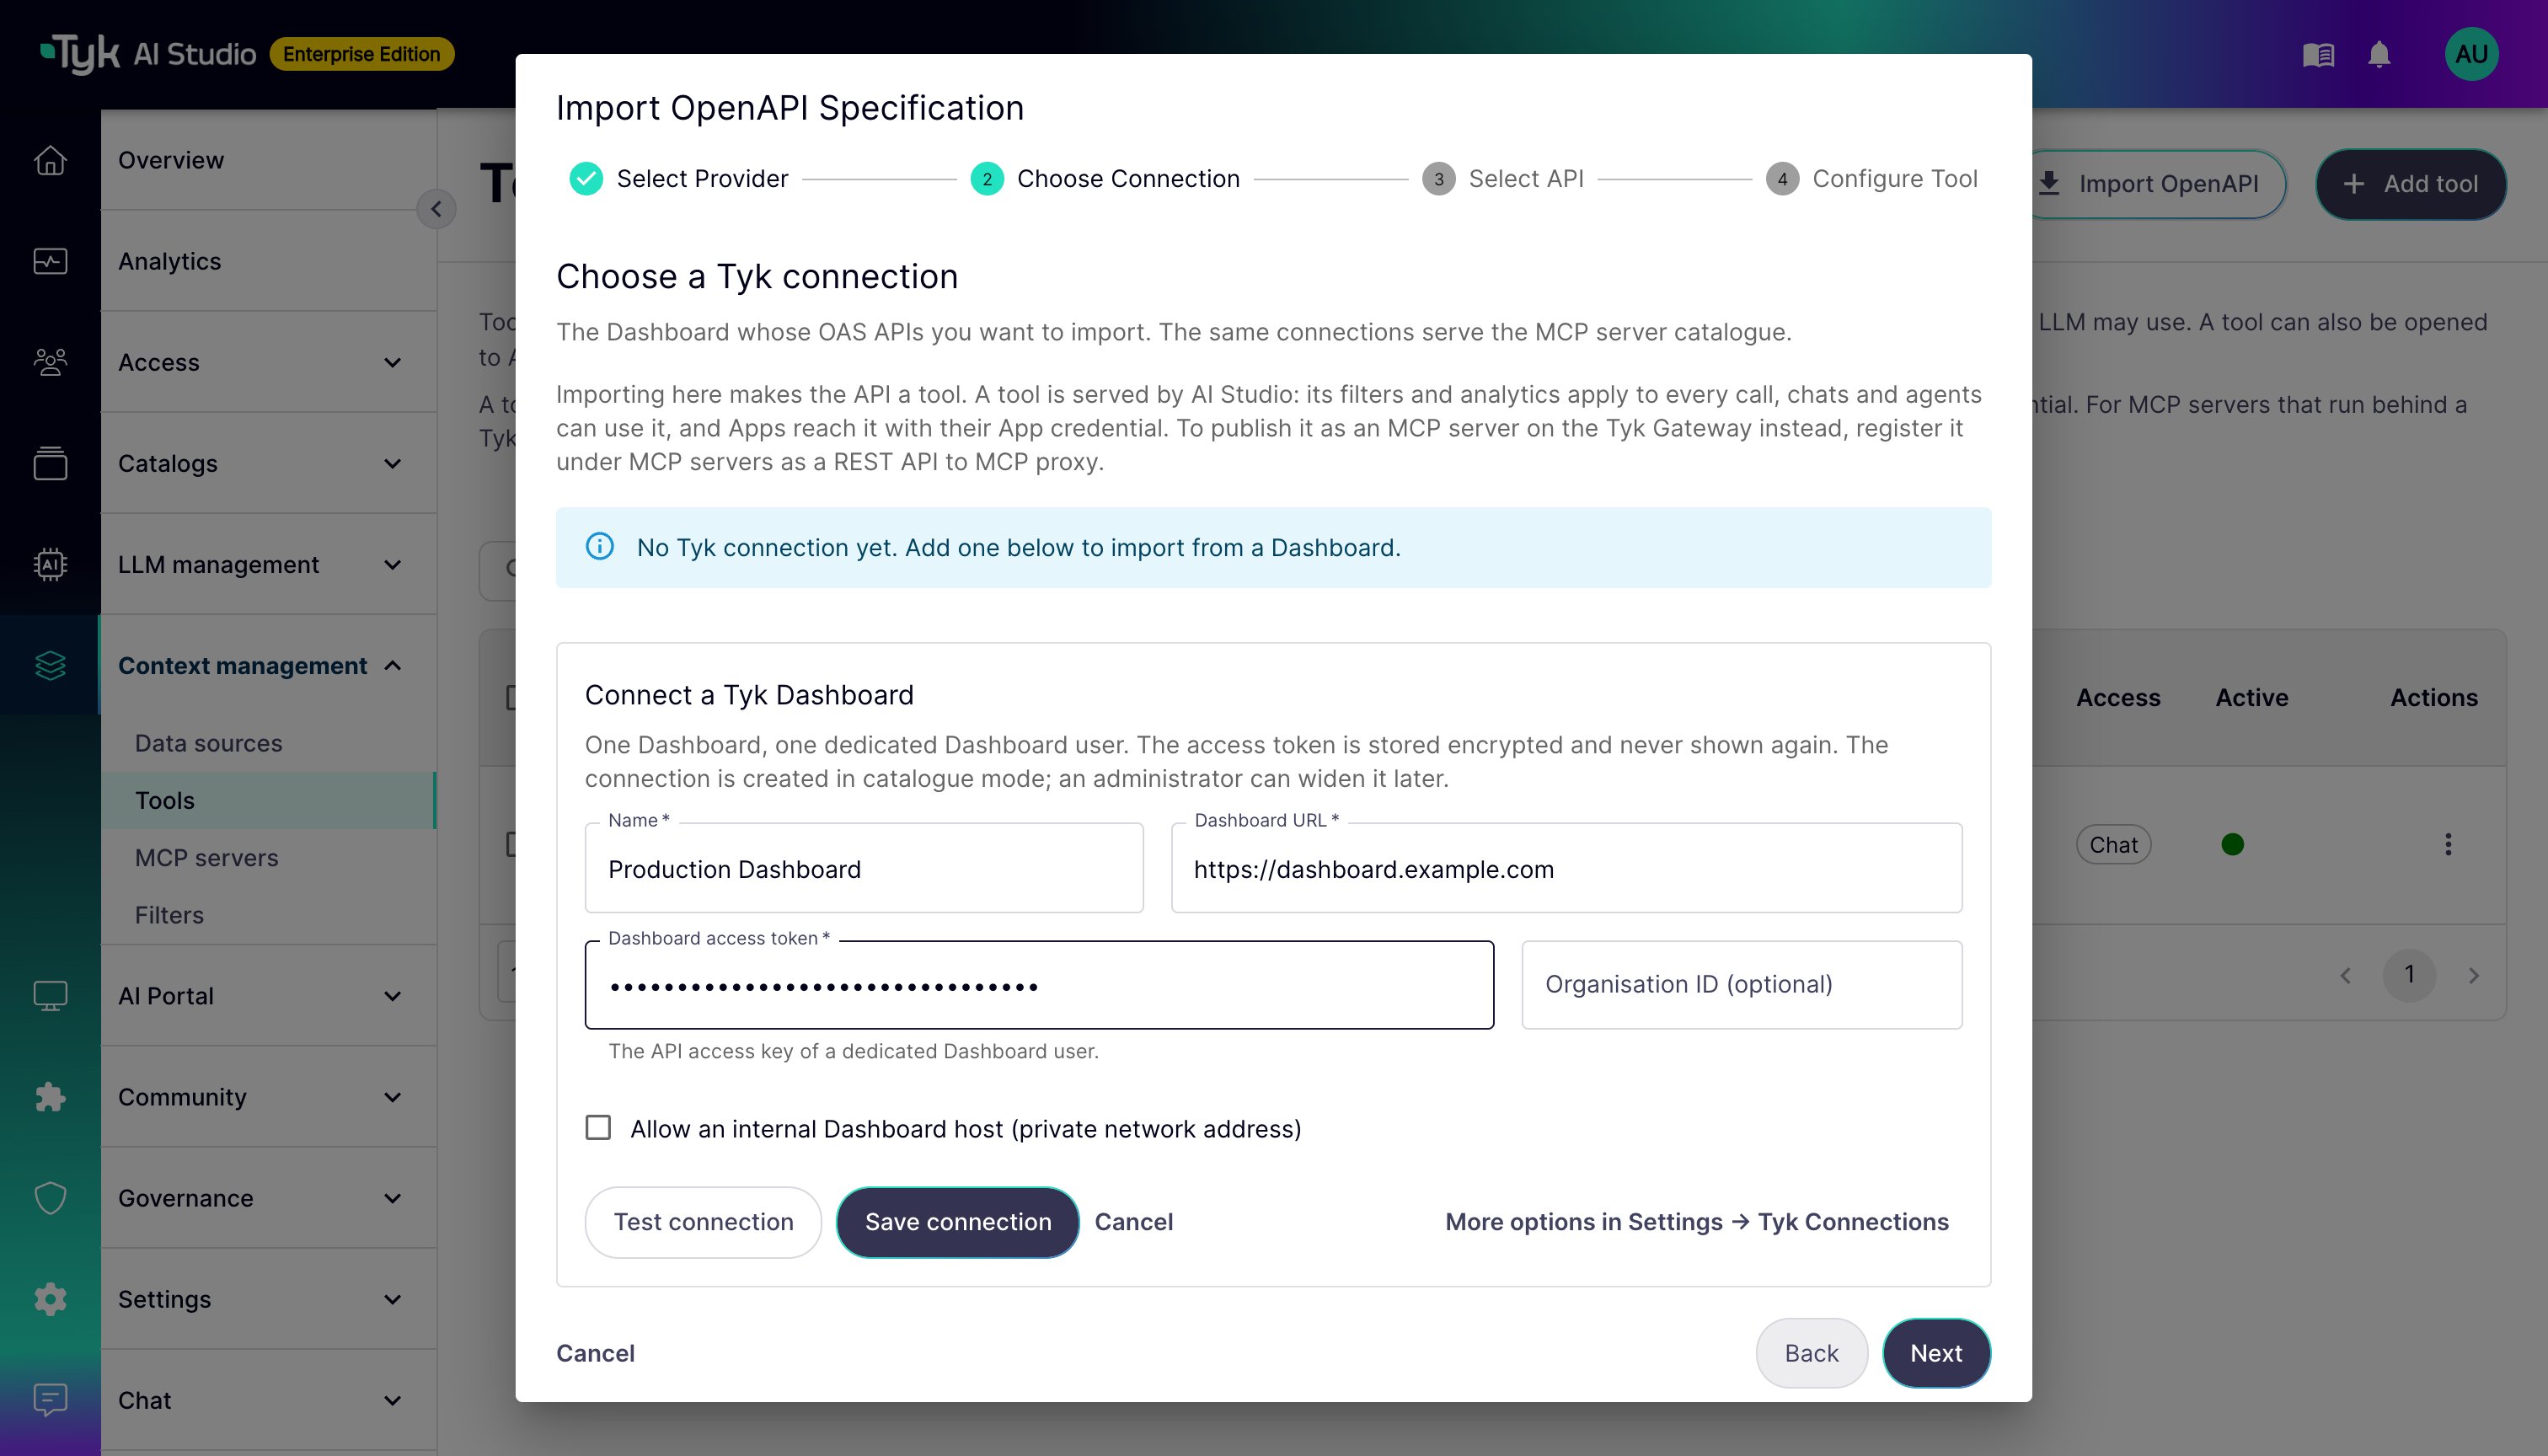
The wizard lists the saved Tyk connections and their status. Select a connection, then click Next. If there is no correct connection, add one in the wizard:- Click Add connection.
- Enter the Name of the connection.
- Enter the Dashboard URL, for example
https://dashboard.example.com. - Enter the Dashboard access token. Use the API access key of a dedicated Dashboard user.
- (Optional) Enter the Organisation ID.
- If the Dashboard has a private network address, select Allow an internal Dashboard host (private network address). This option lets AI Studio connect to an internal address. By default, AI Studio refuses internal addresses, so that a connection cannot send requests to other services on your internal network. Select it only for a Dashboard at a fixed internal address that you trust.
- Click Test connection. AI Studio checks the URL and the token against the Dashboard API.
- Click Save connection. AI Studio creates the connection in
cataloguemode and selects it.
tyk-connections:write permission. To import a tool, you need tools:write. To change the other settings of a connection (trust mode, gateway URLs, MDCB, and API template), go to Settings > Tyk Connections.
Select an API
The wizard lists the Tyk OAS APIs on the Dashboard, by name and listen path. Inactive APIs show an inactive label. You cannot import Tyk Classic API definitions as tools. Select one API from the list, then click Next. To import more APIs, repeat the wizard.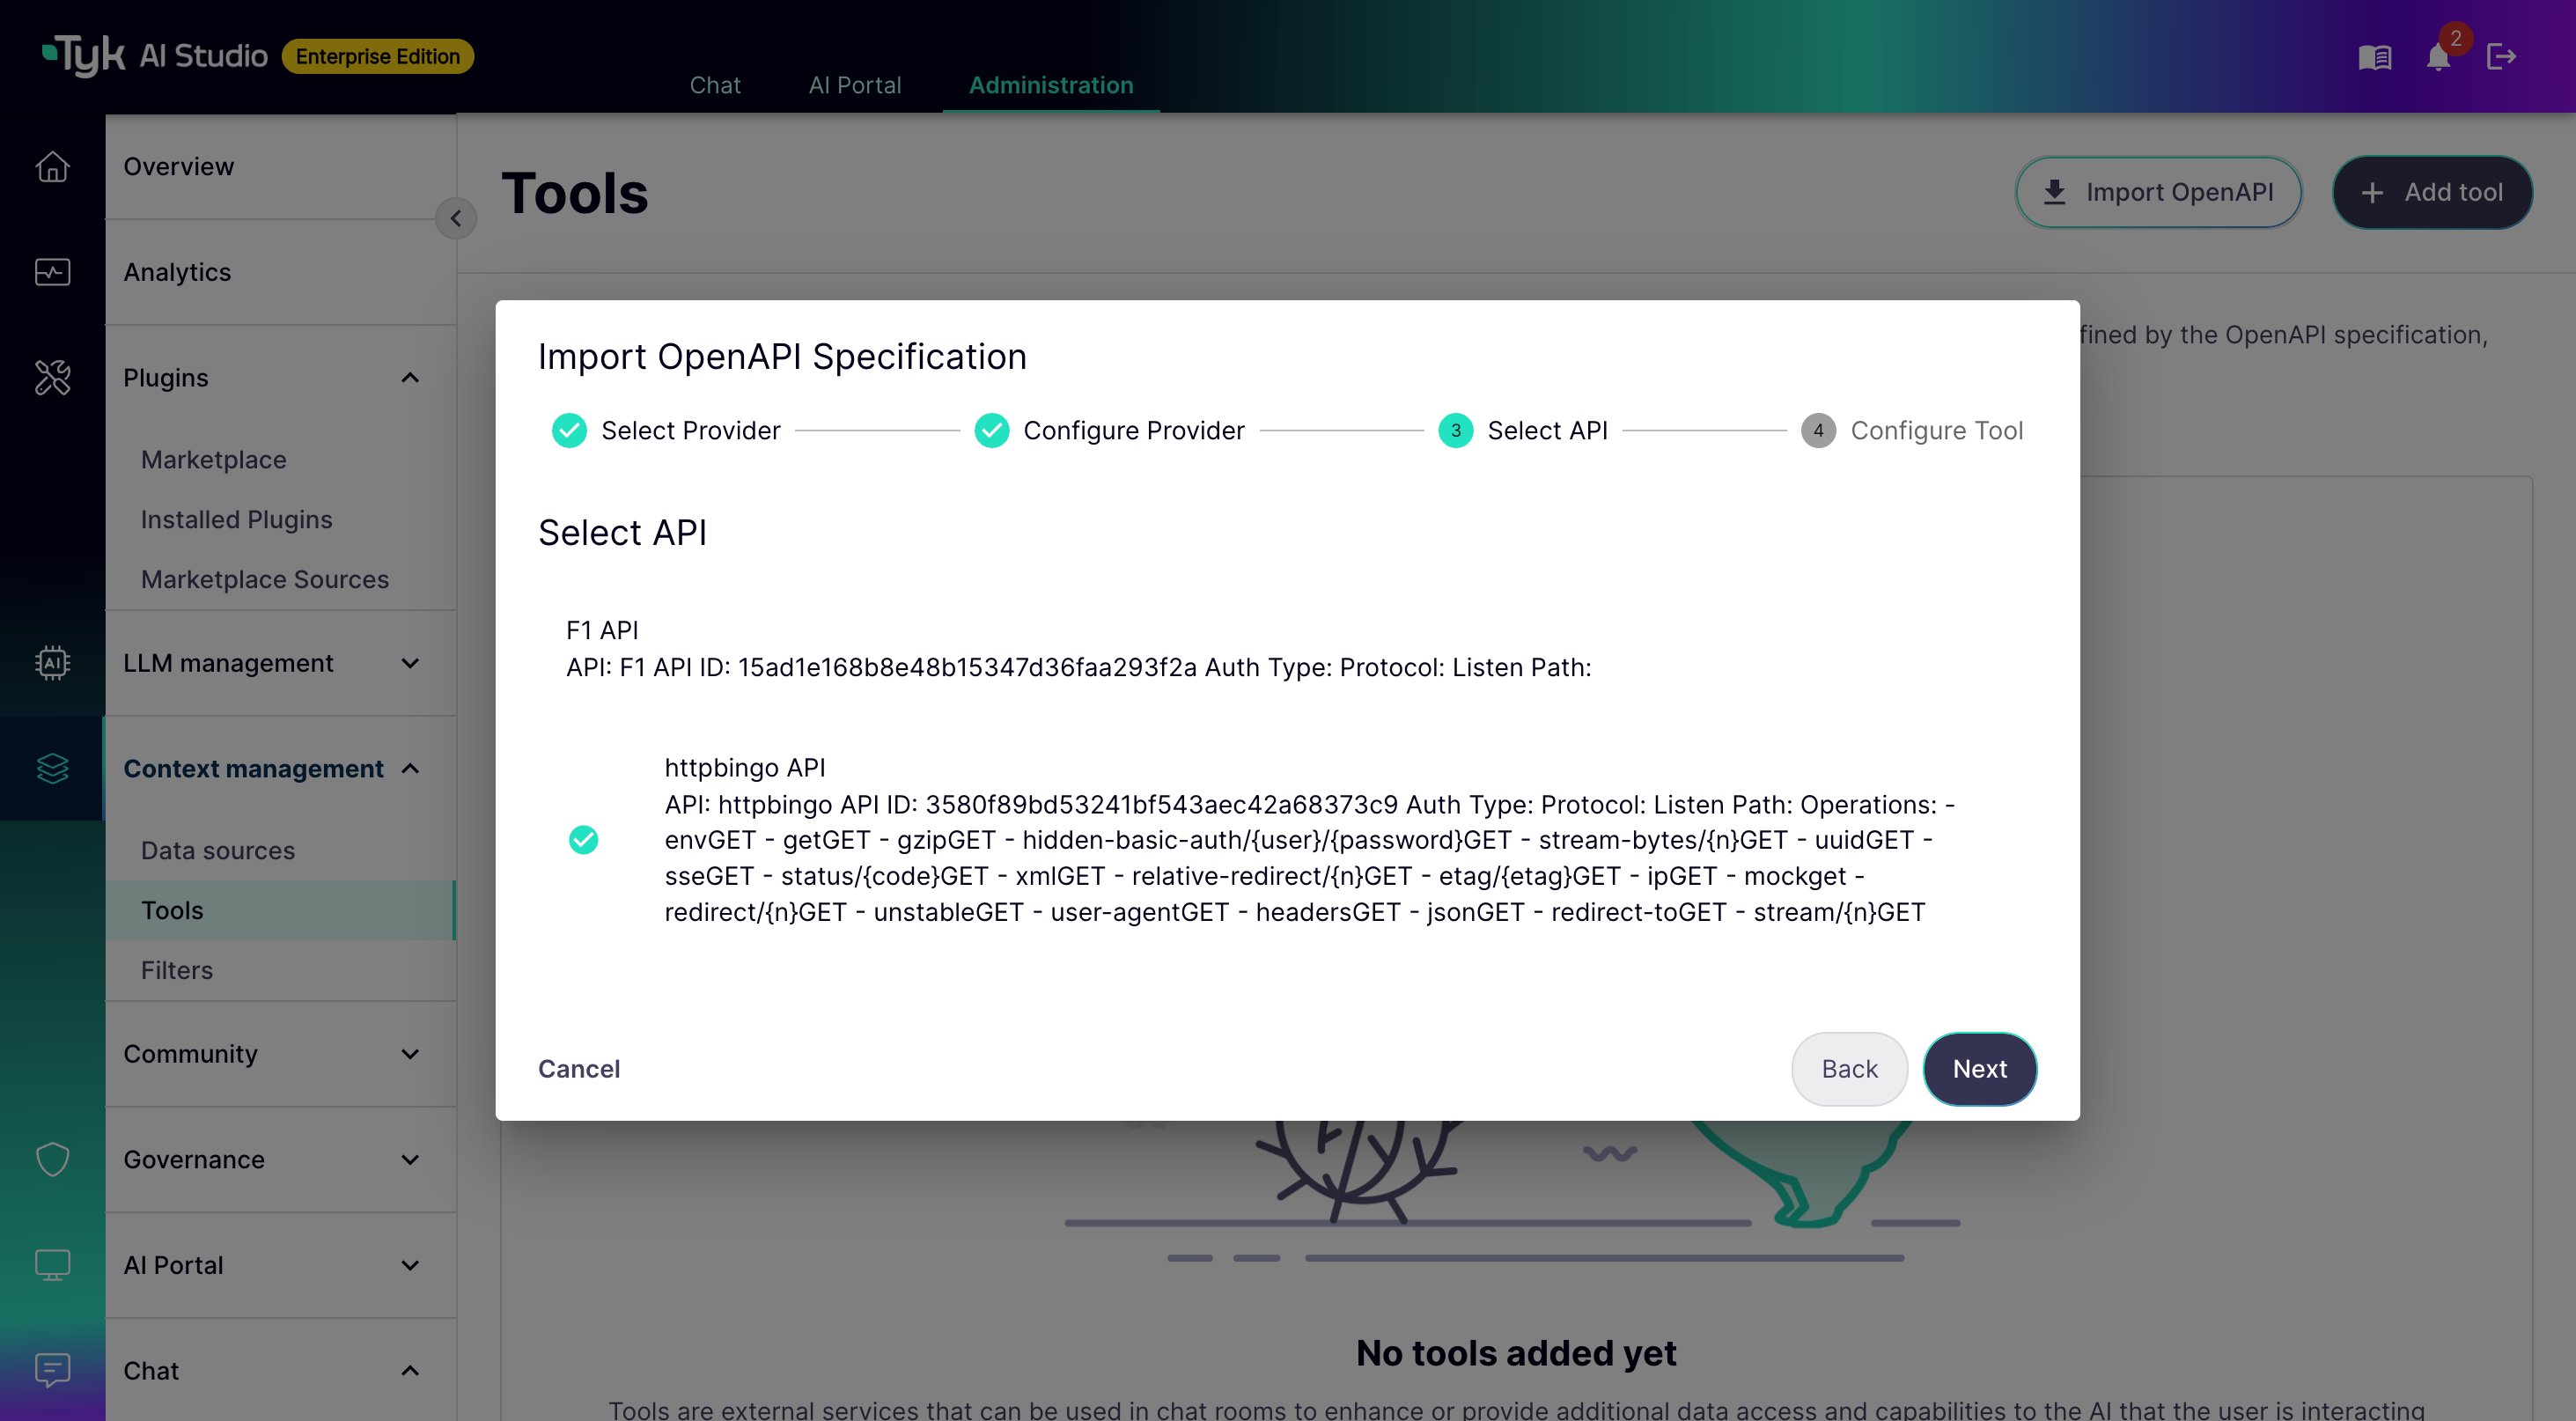
Configure the Tool
The wizard pre-fills the following fields from the selected API. Review and edit them before you save:- Name: The API’s name in Tyk Dashboard.
- Description: A generated summary of the API. It includes the API ID, authentication type, protocol, listen path, and available operations.
- Privacy Level: Select a level, or enter a score from 0 to 100. Change it to match the sensitivity of the data the API returns. See Privacy Levels for more details.
- Auth Schema Name: The name of the security scheme detected in the specification.
- Auth Key: The credential the tool uses to call the imported API. Tyk AI Studio does not fetch this value for you. Enter it yourself, as a direct value or as a secret reference such as
$SECRET/JiraAuthToken. Leave this field blank if the API needs no authentication. - Access methods: Turn on REST API or MCP if Apps must reach the tool on the gateway. Refer to Access Methods.
x-tyk-api-gateway extension. AI Studio masks every credential in it (upstream authentication and request headers that look like credentials) before the document reaches AI Studio.
In versions before v2.2.0, you entered a URL and a token in the wizard, and the import used the
/api/v1/providers/* API. This API is removed. The Community Edition supports Direct Import only.Organizing & Assigning Tools (Admin)
- Create Catalogues: Group related tools into Tool Catalogues (e.g., “CRM Tools”, “Search Tools”).
-
Assign to Teams: Assign Tool Catalogues to specific teams. This grants users in those groups potential access to the tools within the catalogue.
Using Tools (User)
Tools become available to end-users within the Chat Interface if:- The specific Chat Experience configuration includes the relevant Tool Catalogue.
- The user belongs to a Team that has been assigned that Tool Catalogue.
- The Tool’s privacy level is compatible with the LLM being used in the Chat Experience.