Availability
| Edition | Deployment Type |
|---|---|
| Community & Enterprise | Self-Managed, Hybrid |
This guide assumes you are logged in as a Studio Administrator with full permissions to configure the system.
1. Login to the AI Studio
After completing the installation process and registering your first user:-
Access the UI: Open your web browser and navigate to your configured
SITE_URL -
Admin Login: Log in using the administrator account you created during registration:
 Reminder: If you haven’t completed the initial registration yet, go back to your installation guide and follow the “First User Registration” section.
2. Configure Your First LLM
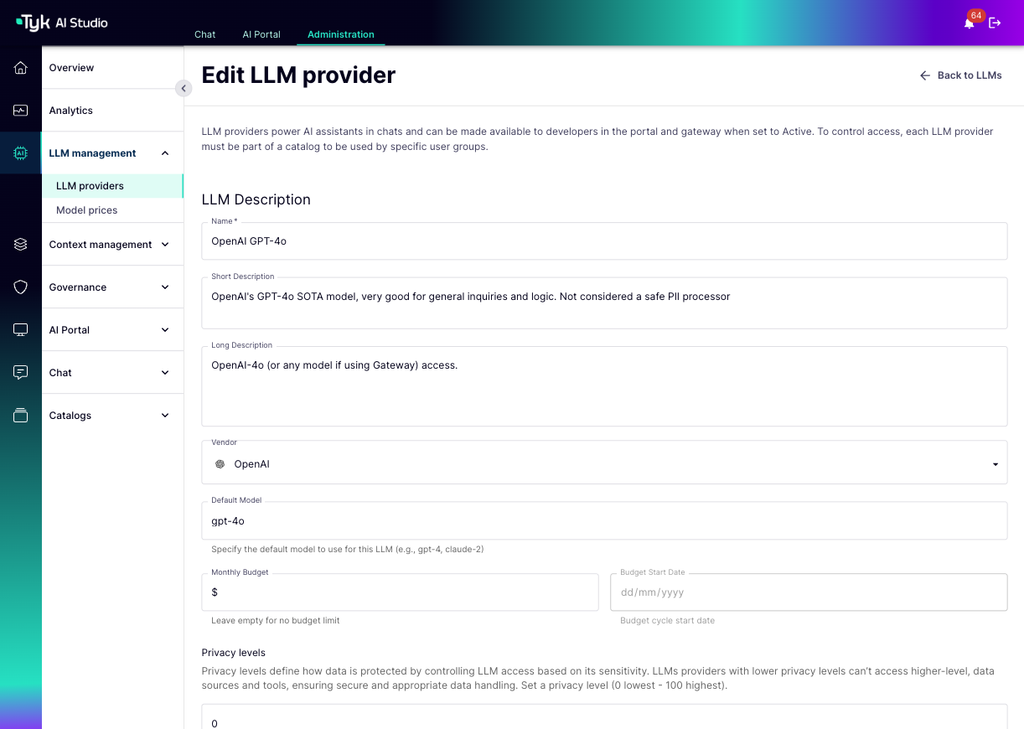
One of the most common initial steps is connecting Tyk AI Studio to an LLM provider.- Navigate to LLM Management: In the admin UI sidebar, select LLM Management > LLM Providers.
- Add LLM Configuration: Click the button to add a new LLM Configuration.
-
Enter Details:
- Configuration Name: Give it a recognizable name (e.g.,
OpenAI-GPT-4o). - Description: Optionally, add a description for this configuration.
- Select Vendor: Choose the LLM provider you want to connect (e.g., OpenAI, Anthropic, Azure OpenAI).
- Select Default Model: Specify the exact model identifier(s) provided by the vendor (e.g.,
gpt-4o,gpt-4-turbo). - Add API Key in the Access Details section:
Do not paste your API key directly here. Instead, use Secrets Management.
- If you haven’t already, go to the Secrets section in the admin UI and create a new secret:
- Variable Name:
OPENAI_API_KEY(or similar) - Secret Value: Paste your actual OpenAI API key here.
- Save the secret.
- Variable Name:
- Return to the LLM Configuration screen.
- In the API Key field, enter the secret reference:
$SECRET/OPENAI_API_KEY(using the exact Variable Name you created).
- If you haven’t already, go to the Secrets section in the admin UI and create a new secret:
- Other Parameters: Configure any other provider-specific settings (e.g., Base URL for Azure/custom endpoints, default temperature, etc.).
- Configuration Name: Give it a recognizable name (e.g.,
-
Save: Save the LLM configuration.
3. Create Chat Experience
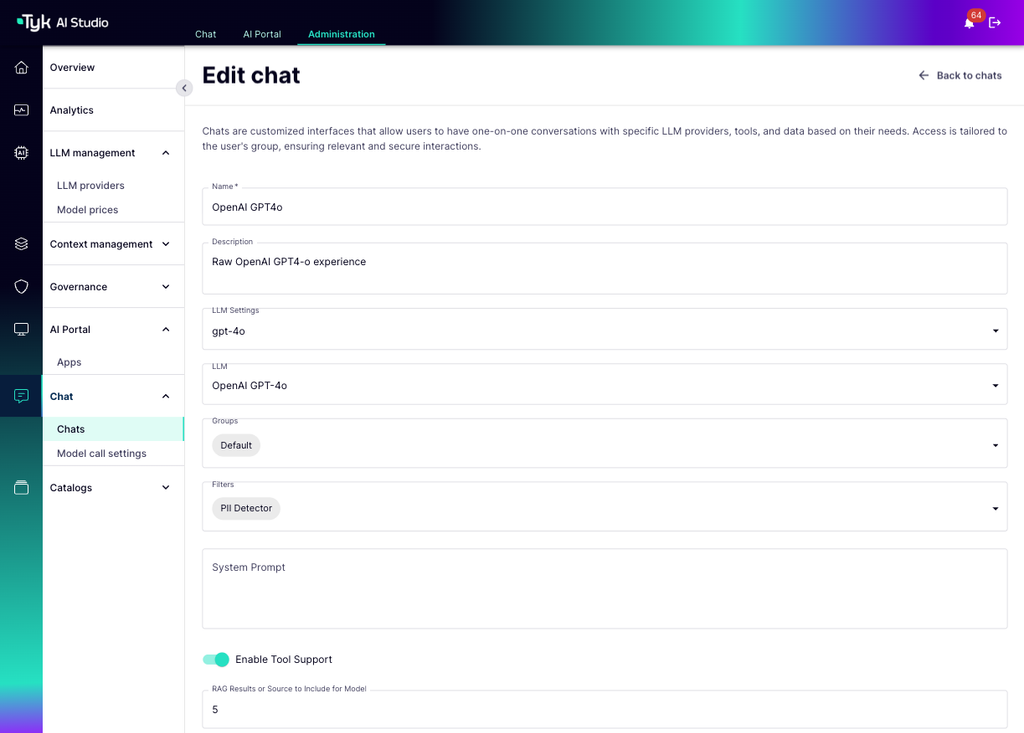
- Navigate to the Chats > Chats section in the admin UI.
-
Click to create a new Chat Experience.
- Name: Give your chat a descriptive name (e.g.,
OpenAPI GPT4o). - LLM Call settings: Select the LLM Call settings you want to use for this chat (e.g.,
gpt-4o). If the specific model settings are not available, you can create one in the LLM model settings page. We have added defaults for the popular ones. - Select LLM vendor: Select the LLM configuration you created in the previous step.
- Select Group: Assign this chat to a specific Group or select “Default” to make it available to all users.
- Name: Give your chat a descriptive name (e.g.,
-
Save the new Chat Experience.
4. Use the Chat Interface
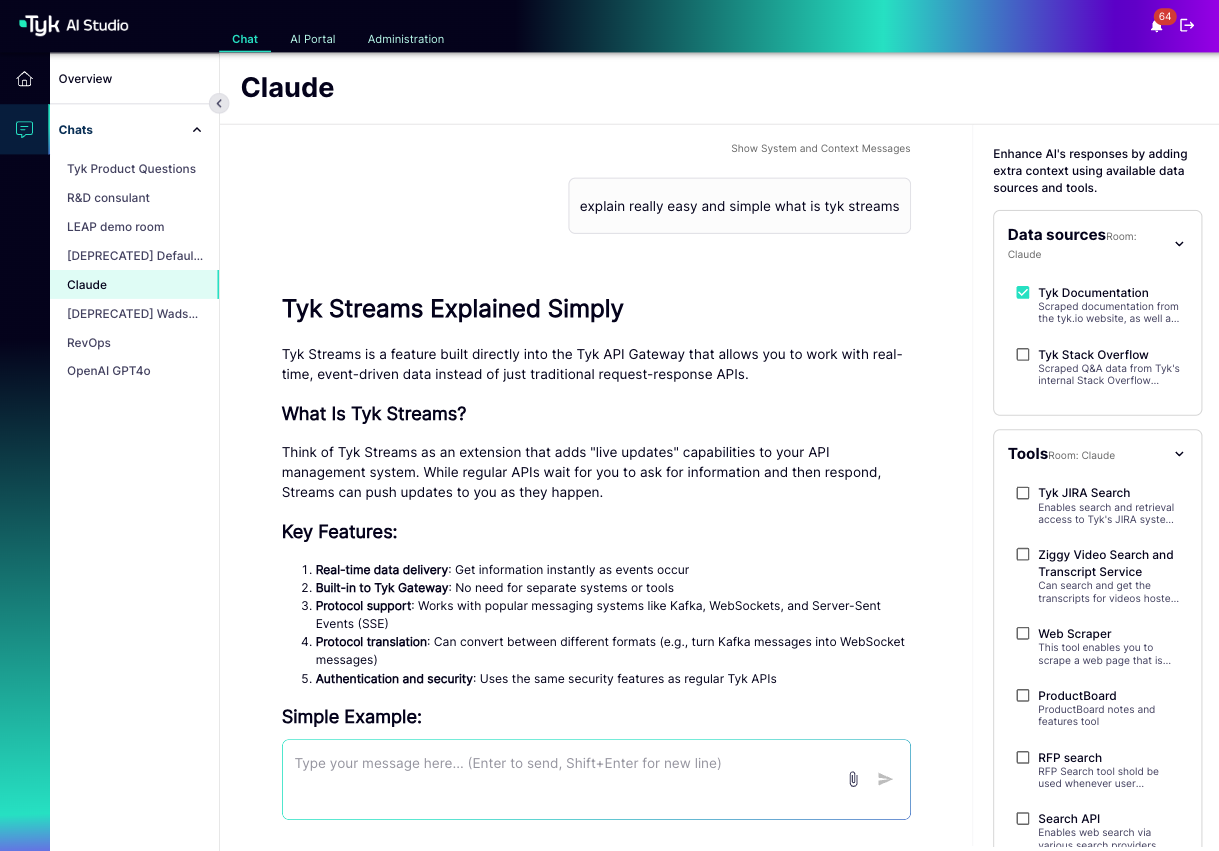
- Navigate to the Chat tab at the top of the UI.
-
Select Chat Experience: Choose the
OpenAPI GPT4oexperience you just created from the list of available chats. - Interact: Type a question or prompt in the chat box.
-
Receive Responses: The LLM will process your request and stream the response back to you in the chat window.
Next Steps
With the initial configuration complete, you can now:- Explore User Management to create users and groups.
- Set up Tools for external API integration.
- Configure Data Sources for RAG.
- Define Filters for custom request/response logic.